- Downloaded
- 689.4 GB
- Uploaded
- 10.1 TB
- Ratio
- 14.98
- Seedbonus
- 3,230,930
- Upload Count
- 0 (0)
Member for 9 years
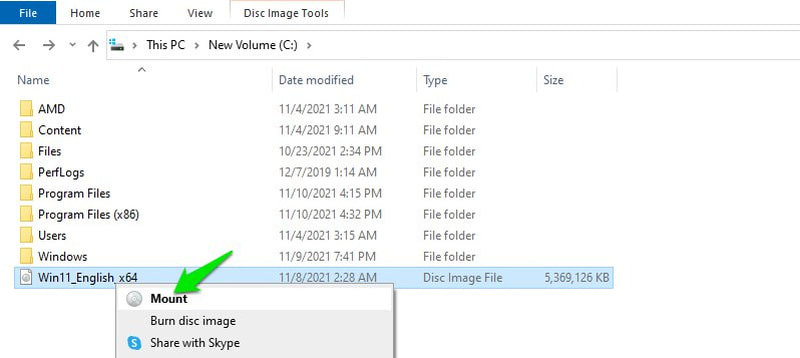
Step 1: You need to mount Windows 11 ISO first. On Windows 8, 8.1, or 10, you can right-click the file and select Mount. On older versions, you need to use third-party mounting software like WinCDEmu.
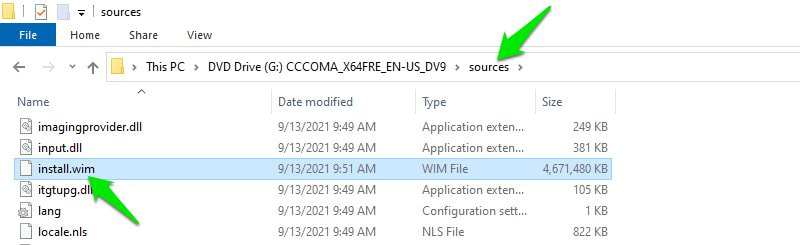
Step 2: Once mounted, go to the sources folder inside Windows 11 and copy (Ctrl+C) a file named install.wim.
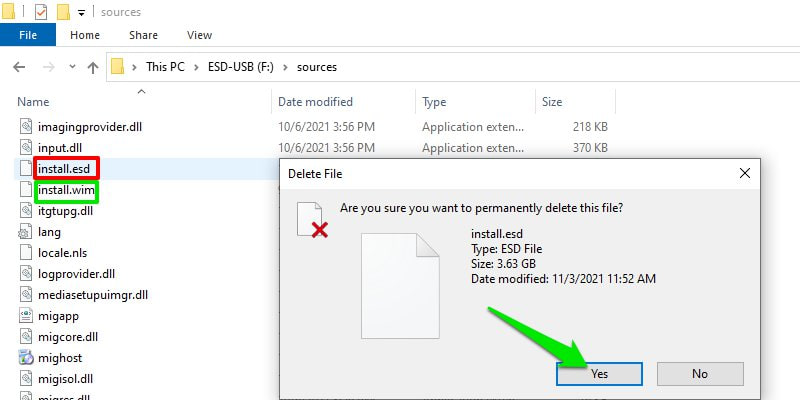
Step 3: Now open the bootable Windows 10 USB drive in file explorer and move to its sources folder.
Step 4: Here, delete the file named install.esd and paste the install.wim file you just copied. If Windows gives an error that the file is too big to move, you must convert your USB to the NTFS file system first.
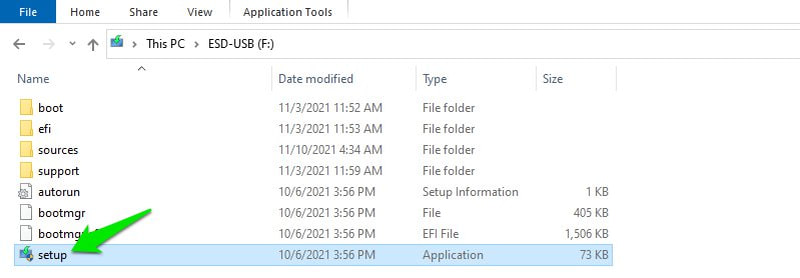
Step 5: Now run the Windows 10 setup file inside the USB drive.
Step 6: Click on Change how Windows Setup downloads updates option and select Not right now.
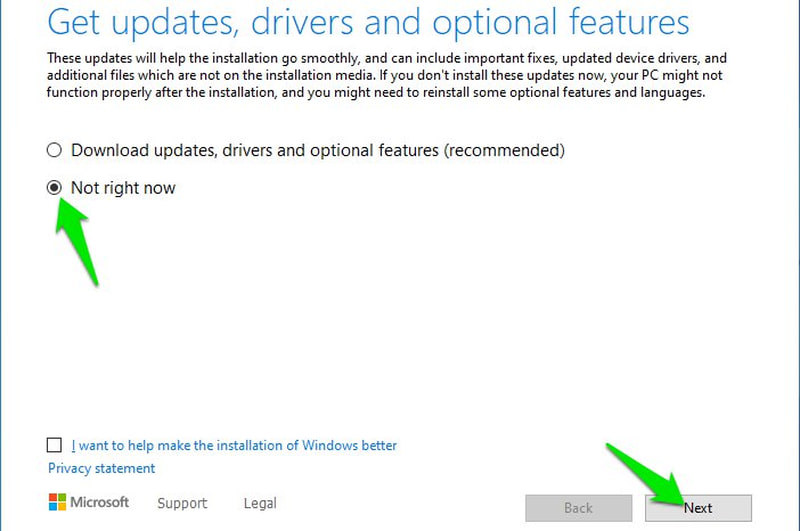
Step 7: Click Next and Windows will ask to accept terms and conditions and then tell you what version of Windows 11 will be installed and what data you’d like to keep.
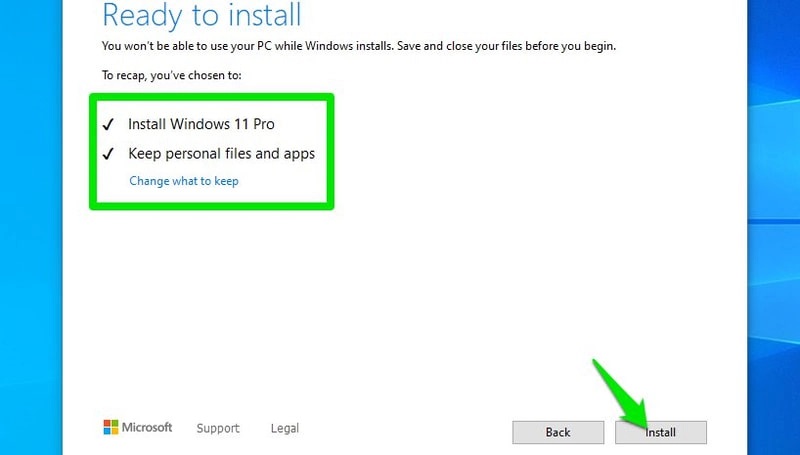
Step 8: After you make your selection, Windows will go through the installation process and then restart the PC. Once it restarts, it will ask you to either upgrade the current Windows or install it on a new drive. Make sure you select upgrade current Windows here.
That’s it. The Windows installation process will start. Also, even though the process will say ‘install Windows 10’, Windows 11 will be installed.
Note: This is an unofficial hack, so it comes with the limitation of not being able to install Windows 11 by booting the PC with the USB. This is the reason why I instructed you to choose to upgrade current Windows when asked after the restart instead of choosing to install in a new drive. Otherwise, it will just give a drive error, and you’ll have to restart the process from inside the Windows.
Step 2: Once mounted, go to the sources folder inside Windows 11 and copy (Ctrl+C) a file named install.wim.
Step 3: Now open the bootable Windows 10 USB drive in file explorer and move to its sources folder.
Step 4: Here, delete the file named install.esd and paste the install.wim file you just copied. If Windows gives an error that the file is too big to move, you must convert your USB to the NTFS file system first.
Step 5: Now run the Windows 10 setup file inside the USB drive.
Step 6: Click on Change how Windows Setup downloads updates option and select Not right now.
Step 7: Click Next and Windows will ask to accept terms and conditions and then tell you what version of Windows 11 will be installed and what data you’d like to keep.
Step 8: After you make your selection, Windows will go through the installation process and then restart the PC. Once it restarts, it will ask you to either upgrade the current Windows or install it on a new drive. Make sure you select upgrade current Windows here.
That’s it. The Windows installation process will start. Also, even though the process will say ‘install Windows 10’, Windows 11 will be installed.
Note: This is an unofficial hack, so it comes with the limitation of not being able to install Windows 11 by booting the PC with the USB. This is the reason why I instructed you to choose to upgrade current Windows when asked after the restart instead of choosing to install in a new drive. Otherwise, it will just give a drive error, and you’ll have to restart the process from inside the Windows.

")